Unlocking the Secret to Homemade Fluffy Greek Pita Bread: A Culinary Revelation
Imagine the aroma of freshly baked bread wafting through your kitchen, a scent promising warmth, comfort, and an unparalleled culinary experience. Now, imagine that bread is a thick, pillowy, and incredibly soft fluffy Greek pita bread, so tender it practically melts in your mouth. If your only experience with pita bread comes from the dry, stiff, and often tasteless varieties found in grocery stores, prepare for a revelation. Making authentic Greek pita at home is not only surprisingly simple but also transforms your entire perception of this versatile flatbread. You will truly never want to buy store-bought again.
This comprehensive guide will equip you with all the knowledge and tips you need to master the art of homemade pita, turning simple pantry staples into a delicious centerpiece for any meal. From perfectly proofed yeast to the satisfying puff in a hot skillet, we'll walk you through every step, ensuring your homemade fluffy Greek pita bread is the softest, most flavorful you've ever tasted.
Why Homemade Fluffy Greek Pita Reigns Supreme
The distinction between homemade and store-bought pita bread is monumental. While pre-packaged options offer convenience, they often fall short in texture, flavor, and overall satisfaction. Homemade pita, particularly the Greek variety, brings a host of benefits that elevate your dining experience:
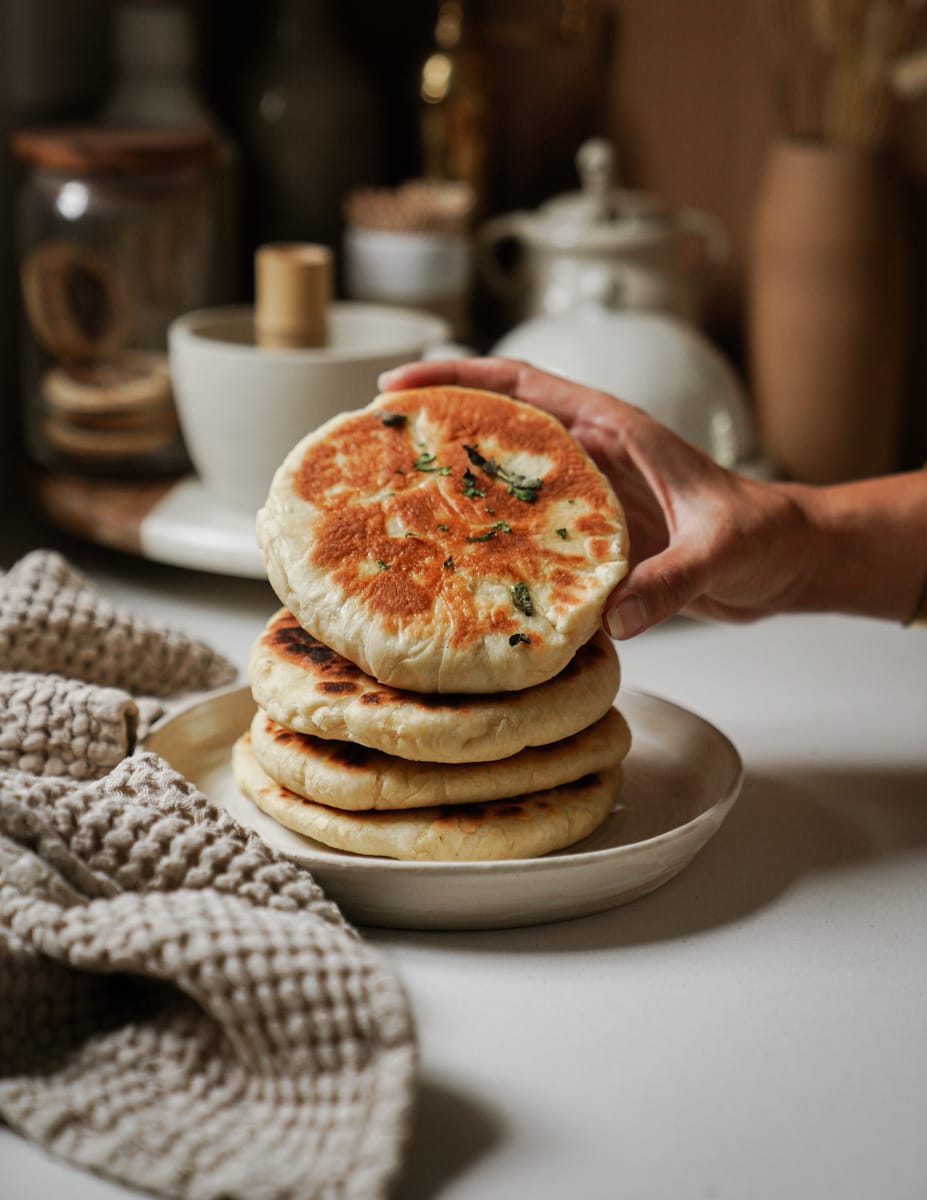
- Unmatched Freshness and Texture: The moment a warm piece of pita comes off the skillet, it possesses a tenderness and chewiness that pre-packaged versions simply cannot replicate. Our recipe yields a thick, pillowy flatbread that is delightfully soft and pliable, perfect for folding, scooping, or wrapping.
- Superior Flavor Profile: Fresh ingredients, especially good quality olive oil, contribute to a richer, more nuanced flavor. The subtle sweetness from the milk and a hint of salt create a balanced taste that complements almost any dish.
- Control Over Ingredients: Making your own means you know exactly what goes into your food. No preservatives, artificial flavors, or unnecessary additives. You choose the best quality flour, yeast, and olive oil, ensuring a healthier and more delicious product.
- Economical and Rewarding: Pita bread is incredibly cost-effective to make at home, relying on basic pantry staples. Beyond the financial savings, there's immense satisfaction in creating something so delicious from scratch, filling your home with an irresistible aroma.
Essential Ingredients for Your Best Homemade Pita
Achieving that signature soft and airy texture in your fluffy Greek pita bread starts with understanding the role of each ingredient. You'll be pleased to know that most of these are likely already in your kitchen.
- Warm Water & Milk: The liquid base for our dough. The combination of water and whole milk creates a richer, more tender crumb than water alone. Milk is packed with protein, calcium, and vitamins A & D, and its fats contribute to the pita's pillowy texture. Crucially, the temperature must be just right – warm enough to activate the yeast (think baby bathwater warm, around 105-115°F or 40-46°C), but not so hot that it kills it.
- Granulated Sugar: A small amount of sugar acts as food for the yeast, helping it to activate and thrive. It also contributes to the golden-brown crust and a subtle sweetness.
- Active Dry Yeast: This is the engine of your pita, responsible for the lift and airiness that prevents it from being flat and hard. Ensuring your yeast is fresh and active is paramount. Proofing it in warm liquid with sugar is the best way to confirm its vitality.
- High-Quality All-Purpose Flour: While many flours work, a high-quality unbleached all-purpose flour, like King Arthur's, is highly recommended. Its consistent protein content provides the perfect structural balance, giving the bread enough strength to hold fillings while maintaining a tender, delicate crumb. Lower quality flours can lead to a gummy texture or pita that tears too easily.
- Extra Virgin Olive Oil: Beyond its incredible flavor, olive oil is a cornerstone of Greek cuisine and this pita recipe. It’s loaded with heart-healthy monounsaturated fats and powerful antioxidants. In the dough, olive oil contributes to its elasticity, tenderness, and rich flavor. Don't be shy with it – as the saying goes, pour with your heart!
- Salt: Essential for enhancing flavor and balancing the sweetness. It also plays a role in regulating yeast activity, ensuring a steady rise.
The Step-by-Step Journey to Your Best Fluffy Greek Pita Bread
Let's dive into the hands-on process of creating your sensational homemade fluffy Greek pita bread. This recipe is designed to be straightforward, even for novice bakers.
1. Activating the Yeast: The Foundation of Fluffiness
In a medium-sized mixing bowl, combine the warm water and milk. The temperature is key here – it should feel very warm to the touch, but not so hot that you can't comfortably keep your finger in it for a few seconds. Whisk in the sugar, then sprinkle the active dry yeast over the surface. Give it a gentle stir. Let this mixture sit undisturbed for 5-10 minutes. You'll know your yeast is active and ready when a frothy, foamy layer forms on top. This indicates the yeast is alive and well, ready to make your pita rise beautifully.
2. Building the Dough: Kneading for Elasticity
Once your yeast is frothy, whisk in the olive oil and salt. Gradually add the flour, stirring with a wooden spoon until a shaggy, somewhat sticky dough begins to form. At this point, transfer the dough to a lightly floured work surface. Knead the dough for a full 10 minutes. This might seem like a long time, but kneading is crucial for developing the gluten, which gives the pita its elasticity and chewy texture. As you knead, the dough will transform from sticky and shaggy to smooth, soft, and much more elastic. If the dough feels overly sticky, lightly dust your hands and the surface with a little extra flour, or wet your hands slightly with water.
3. The Double Rise: Patience Pays Off
Place the kneaded dough back into the mixing bowl. Lightly grease the bowl with a little olive oil first to prevent sticking. Cover the bowl tightly with plastic wrap or a damp tea towel. Find a warm spot in your kitchen – perhaps near a sunny window, on top of a warm oven, or in an oven with just the light on – and let the dough rise until it has doubled in size. This typically takes about 1 ½ hours, but can vary depending on the warmth of your environment. This first rise is vital for developing flavor and creating that airy internal structure.
4. Shaping and Second Rise: Preparing for the Pan
Once the dough has doubled, gently punch it down to release the air. Transfer it back to your lightly floured work surface. Form the dough into a cohesive circle and then divide it into 6 equal pieces. A dough scraper or a sharp knife can help with this. Roll each piece into a small ball, then gently flatten it into a circle. Arrange these 6 dough circles on a parchment-lined baking sheet, leaving some space between them. Cover them loosely with a clean tea towel and let them rest for another hour. This second rest, or "proof," allows the gluten to relax and gives the pita an extra boost of puffiness.
5. Rolling and Cooking: The Magic of the Puff
After the second rise, take each dough circle and, using a rolling pin, roll it out into a 5-inch wide circle, about ¼ inch thick. The consistency in thickness is important for even cooking and puffing. Now, for the exciting part: cooking! Heat a cast iron skillet or heavy-bottomed non-stick pan over high heat for 3-4 minutes until it's very hot. Reduce the heat to medium. Carefully place one rolled-out dough round into the hot pan. Cook for 30 seconds, then flip. Cook for another 30 seconds. At this point, you should see the pita starting to puff up – it’s truly magical! Drizzle about 1 tablespoon of olive oil over the pita, flip it again, and drizzle the other side with another tablespoon. Continue cooking for another 5 minutes, flipping every minute, until the pita is deep golden brown and beautifully puffed. Repeat this process for all 6 pitas. For a deeper dive into the technique, check out our Easy Guide: How to Make Pillowy Fluffy Greek Pita Bread.
Tips for Perfection and Serving Suggestions
To ensure your fluffy Greek pita bread turns out perfectly every time, keep these tips in mind:
- Don't Rush the Rises: Patience is a virtue in bread making. The full rising times are essential for flavor development and texture.
- Mind the Heat: A properly heated pan is crucial for the pita to puff. If the pan isn't hot enough, the pita won't puff up correctly and might become dense.
- Storage: Store leftover pita bread in an airtight container or a Ziploc bag at room temperature for up to 3 days, or freeze for longer storage. Reheat gently in a dry skillet or microwave.
- Variations: Experiment with flavors! Add a pinch of dried oregano, garlic powder, or even a sprinkle of za'atar to the dough for an aromatic twist. You can also brush the cooked pita with garlic-herb butter.
Once you’ve made your irresistible homemade fluffy Greek pita bread, the possibilities are endless for serving! Enjoy it warm, topped with fresh oregano and a generous dollop of your favorite Greek dip like tzatziki, hummus, or baba ghanoush. It’s also the ultimate vessel for wraps, whether it’s classic souvlaki or gyros, or even a fresh falafel sandwich. Tear it into pieces for dipping into olive oil and balsamic, or use it to scoop up vibrant salads. For more inspiration, explore our Best Fluffy Greek Pita Recipe for Dipping, Scooping & Wraps.
Conclusion
Embracing the joy of making your own homemade fluffy Greek pita bread is a culinary journey you won't regret. The superior taste, texture, and satisfaction of pulling a warm, puffy pita straight from the pan far outweigh the convenience of store-bought alternatives. With just a few simple ingredients and a little patience, you can consistently create a bread that will impress your family and friends, elevating every meal it graces. So, roll up your sleeves, gather your ingredients, and prepare to never look back – homemade pita is here to stay!
